I used various dies for the large flowers throughout the auction. I had spent a lot of time looking at different flowers and I loved the really huge ones. I decided not to go that route in the end as those usually take a lot of paper and can be expensive to make just one. I had a gym to decorate and I wanted to make my budget next to nothing. All these big flowers, except for the red ones, came from 1 large mixed package of cardstock from Office Depot. Each flower takes 8 pages of paper.
I do like using the cardstock for these flowers, it makes them very durable. I made my large ones a little different from the instructions. The petals aren't joined except for the 2 center pieces. I used a 3" circle as the base to glue the petals down. By having the petals as individual petals and not joined, I found I could make them a little bigger.
I used David Tutera Framelits Large Rose, Large Dahlia, and Large Peony, and Leaf dies. I also used my Cricut Explore Air to make large leaves and berries to add some interest.
When I first made flowers, I tried to make them more 3-dimensional. After a while, meaning I had used up a small package of white and red card stock, I realized these were going to be hard to attach to a wall. I put these in a box and switched to making all my other large flower lay flatter. When I went to make all the board designs and came on the box of these flowers, I didn't know what to do with them. I had made a lot and didn't want to waist them, so they became bleacher decorations.
I wanted to spruce up our gym bathrooms a little so flowers went in there as well.
As you can see, the problem with a gym is that things tend not to stick. I had to be careful not to use anything that would mess up the paint or would be permanent. I used repositionable glue dots but we had to add a few more to some of them.
This was my version of a flower wall. There are 2 large insulation boards in the back. I covered the whole thing in brown craft paper and then stapled all the flowers to it. I added leaves and butterflies. I really like the look of adding them. I think the add extra interest.
Labels
- Auction
- Cards
- Centerpieces
- Costumes
- Craft
- Crochet
- Crochet Amigurumi
- Duct Tape Costumes
- Halloween Costume
- Hanging Decorations
- Japanese Sewing Patterns
- Knitting
- Knitting Amigurumi
- Paper Flower Making
- Party Decorations
- Pull Tab Projects
- Quilt
- Sewing
- Sewing Craft
- Sewing for Boys
- Socks
- Steampunk
- Swags
- Tunisian Crochet
- Washi Dress
- Wine Bottle Covers
Saturday, February 16, 2019
Auction: February 9, 2019 Garden Party Swags
Here are the swags that I made for the tables. The letters and flowers are just taped onto curling ribbon. I make my dining room table the length I need for the tables the swags will go on. I don't have a craft room, just my dining room table.
Here's what they looked like all dressed up on their tables.
Auction: February 9, 2019 Garden Party Wine bottle covers
![]() |
I had about 1.5 yards of this yellow print fabric already.
I made a simple bag and used my punched flowers and
curling ribbon to make the tags.
I don't have a better picture of all the bottles all together but they looked really nice all bunched together.
Auction: February 9, 2019 Garden Party Centerpieces
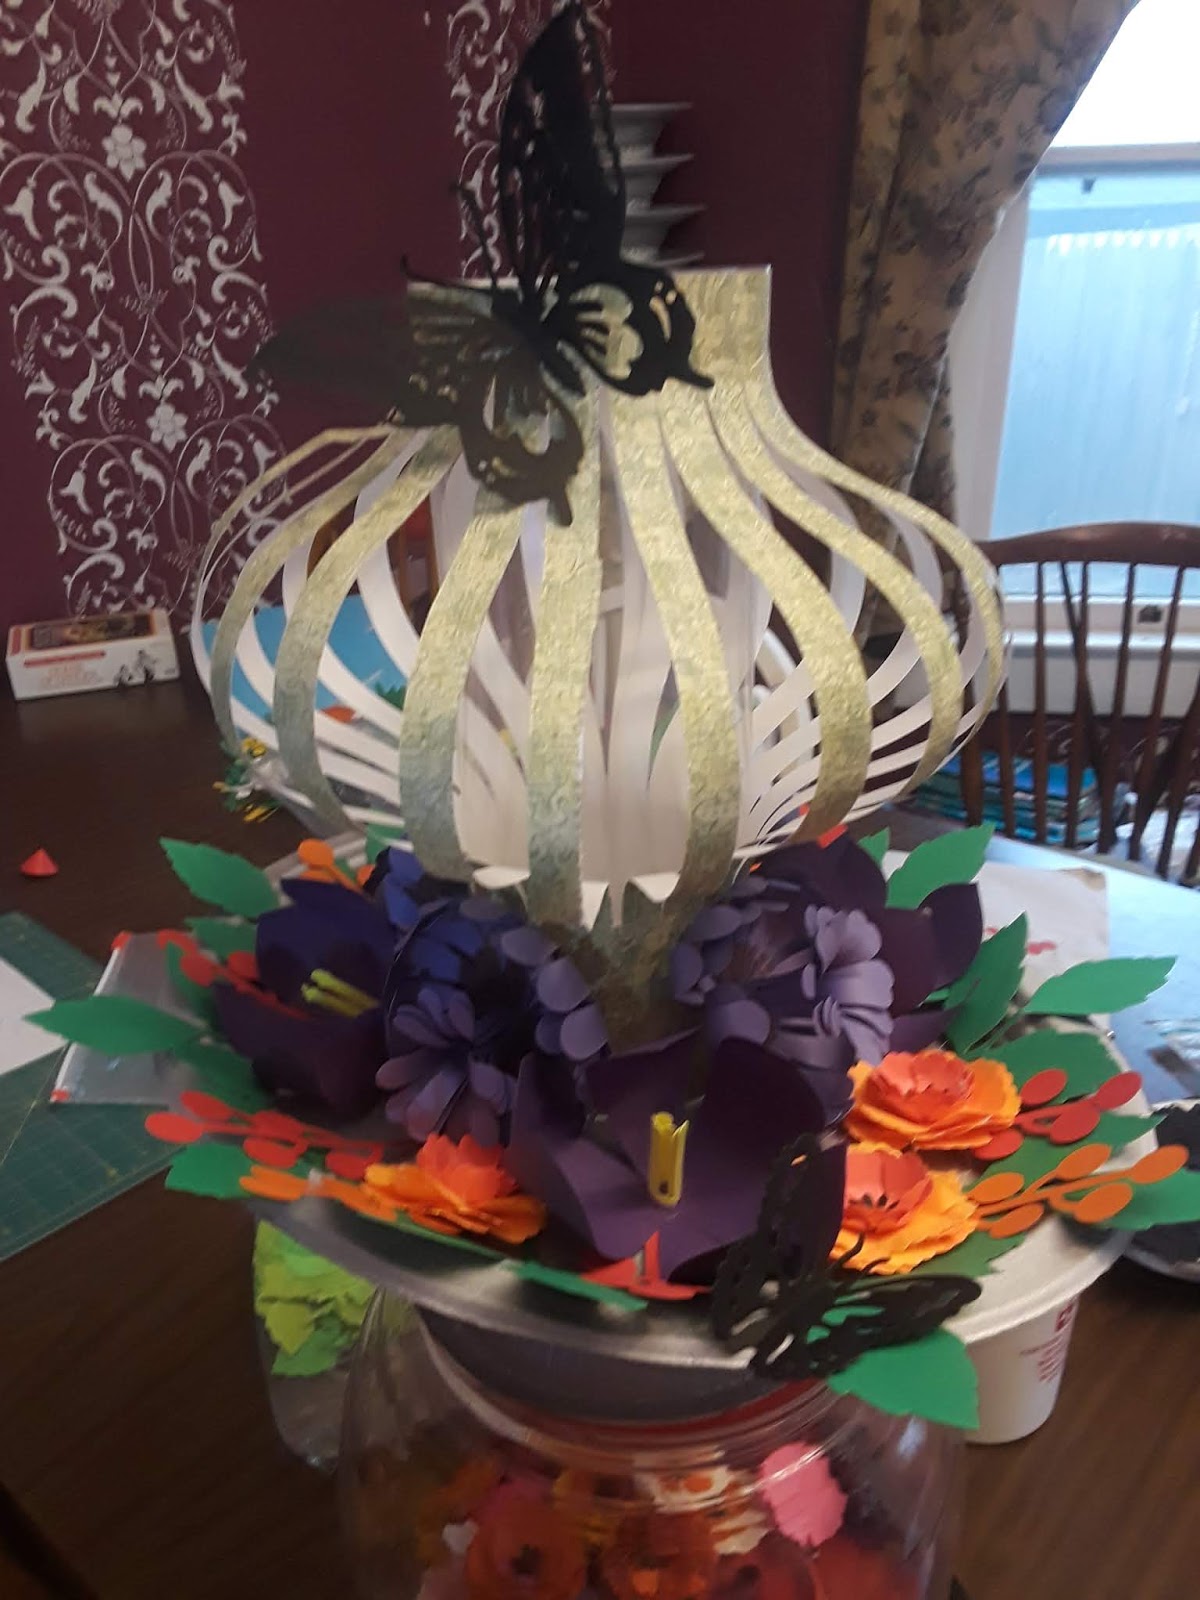
Here are some of the finished centerpieces. They are a combination of flowers made from punches, flowers made from dies, and flowers made from my Cricut Explore Air machine.

In the corner, you can see a stack of the bases. I just used 2 paper bowls and an oval paper plate. I spray painted them silver. I glued two bowls together at the bases and then added the plate on top. I used ribbon to cover the joint between the two bowls. I already had 4 rolls of this ribbon from some past project I couldn't remember and I just had to get 2 more rolls to finish the 30 centerpieces.
I used 11 x 12" paper cut with slits 1" from the top and 3" from the bottom to make the lanterns. There is a sheet of transparency plastic that I rolled into a tube and then wrapped the slit paper around in the middle. I used a die cut butter fly from Cricut Cuttlebug Anna Griffin Butterfly Trio. Each centerpiece had 1 big butterfly and 2 little ones on them. I bent them along their middles to give them a little more dimension.
I used David Tutera's Sizzix Framelits Leaf die for almost all of my leaves. I went through my green card stock in various colors.
I used my Cricut Explore Air machine to make all the berries in various colors.
When the centerpieces were placed on the tables, I lit them by putting a tea light on top of a small plastic cup. The tea light sat too low inside the middle other wise.
I really enjoyed making all of these. They were super pretty when done. They were great because they were lightweight, and because everything was glued on, they were pretty durable. The only problem was that you couldn't stack them. I had them all over my house before the auction.
Here's what they looked like all in a row waiting to go on their tables.
Here's an example of what it looked like finally placed. I made the brown paper centerpiece snowflakes for every table. Your local Home Depot or Lowes is a great place for paper supplies. The brown paper comes in a large roll and is used by painters. It's much cheaper than kraft paper. I found a flower snowflake pattern online and enlarged it to fit my paper. Each circle was about 30" in diameter. They were pretty easy to make but because the paper was thick, they were harder to cut.

In the corner, you can see a stack of the bases. I just used 2 paper bowls and an oval paper plate. I spray painted them silver. I glued two bowls together at the bases and then added the plate on top. I used ribbon to cover the joint between the two bowls. I already had 4 rolls of this ribbon from some past project I couldn't remember and I just had to get 2 more rolls to finish the 30 centerpieces.
I used 11 x 12" paper cut with slits 1" from the top and 3" from the bottom to make the lanterns. There is a sheet of transparency plastic that I rolled into a tube and then wrapped the slit paper around in the middle. I used a die cut butter fly from Cricut Cuttlebug Anna Griffin Butterfly Trio. Each centerpiece had 1 big butterfly and 2 little ones on them. I bent them along their middles to give them a little more dimension.
I used David Tutera's Sizzix Framelits Leaf die for almost all of my leaves. I went through my green card stock in various colors.
I used my Cricut Explore Air machine to make all the berries in various colors.
When the centerpieces were placed on the tables, I lit them by putting a tea light on top of a small plastic cup. The tea light sat too low inside the middle other wise.
I really enjoyed making all of these. They were super pretty when done. They were great because they were lightweight, and because everything was glued on, they were pretty durable. The only problem was that you couldn't stack them. I had them all over my house before the auction.
Here's what they looked like all in a row waiting to go on their tables.
Here's an example of what it looked like finally placed. I made the brown paper centerpiece snowflakes for every table. Your local Home Depot or Lowes is a great place for paper supplies. The brown paper comes in a large roll and is used by painters. It's much cheaper than kraft paper. I found a flower snowflake pattern online and enlarged it to fit my paper. Each circle was about 30" in diameter. They were pretty easy to make but because the paper was thick, they were harder to cut.
Auction: February 9, 2019 Garden Party Flower Making
![]() |
I liked the look of making the centers a different color than the petals. I was looking to make flowers that were more natural. I eventually made over 200 of these sized flowers. They were used in the swags and for the wine bottles.
Once I realized I needed larger sized flowers, I went to my Cricut Explore Air machine. If you want to make flowers in the 6-8" range, this is the way to go. I had 30 centerpieces to make and each one took 4-6 of these larger flowers. They all came out very pretty. I would spend a day cutting them all out on my machine, another day shaping everything, and another day gluing everything together. I made the flowers in groups of 6.
Sunday, May 6, 2018
Sewing for Boys: Storm Trooper Shirt
Storm Trooper Shirt
When I saw this fabric at JoAnn's, I bought all they had left which was about 1.5 yards. I have been looking for it ever since but haven't been able to find any more. I was going to make a shirt for my husband but Damien lucked out and got his new Storm Troopers shirt. This is Simplicity 8180, the boy's view B. I graded up the largest boy's size as that is about a size 8 and I'm glad I did, because now he has more room to grow into it. I'm not crazy about this pattern as I'm finding there are a few details in men's shirts that I really like that this pattern doesn't have. There is no back yoke which splits the back into 2 pieces. I like a collar stand and this has just a fold over collar. I like to have a back facing and this does not, which I think is weird, it just finishes the collar nicely. I do think this is an easy shirt to make and it fits well.
Friday, January 5, 2018
Crafting: Farm Animals
I can't say enough how I love Tomomi Maeda's book Stitched Safari. It has super clear directions and the pieces fit together like puzzle pieces. One of my bucket list items was to make little gifts for all of my relatives in Canada. I used her book to make 2 bears, 2 cows, 5 goats, 3 sheep, 5 pigs, and 5 bunnies. These went to my aunt/uncle and cousins, plus my mom and 2 of her close friends. Since it was Christmas, they all got jingle bells to spruce them up. They were individually wrapped and my mom had everyone pick for their family and be surprised with what they got. Each animal took a few hours to make. They aren't difficult to make but you do need to be precise. I had a great time making them and my son had a great time playing with them before I shipped them all out.
When my cousin's daughter saw the pig her dad got, she asked my mom if I could make a pug and what do you know? Stitched Safari happened to have a pug pattern in it. So a few days latter, there's one for her, one for my neighbor's pug Charles, and one for me. Again, the pattern pieces were perfect.
Subscribe to:
Posts (Atom)